
- What Are Deck Joists, and Why Are They Important?
- Signs That Your Deck Joists Need Repair
- Tools and Materials Needed for Deck Joist Repair
- Tips for Using These Tools and Materials
- Step-by-Step Guide to Repairing Deck Joists
- Preventative Maintenance Tips for Deck Joists
- Cost of Repairing Deck Joists in Austin
- Frequently Asked Questions (FAQs)
Deck repair is a crucial part of maintaining your outdoor living space, and one of the most significant areas to address is damaged deck joists. These horizontal structural elements support your deck boards and are vital for the stability and longevity of your deck. At Austin Deck Builders, we understand the importance of solid deck joists and aim to equip homeowners with the knowledge to identify, assess, and repair damaged joists effectively. This guide will walk you through the process, ensuring your deck is safe and durable for years, and help you prevent deck joist rot.
What Are Deck Joists, and Why Are They Important?
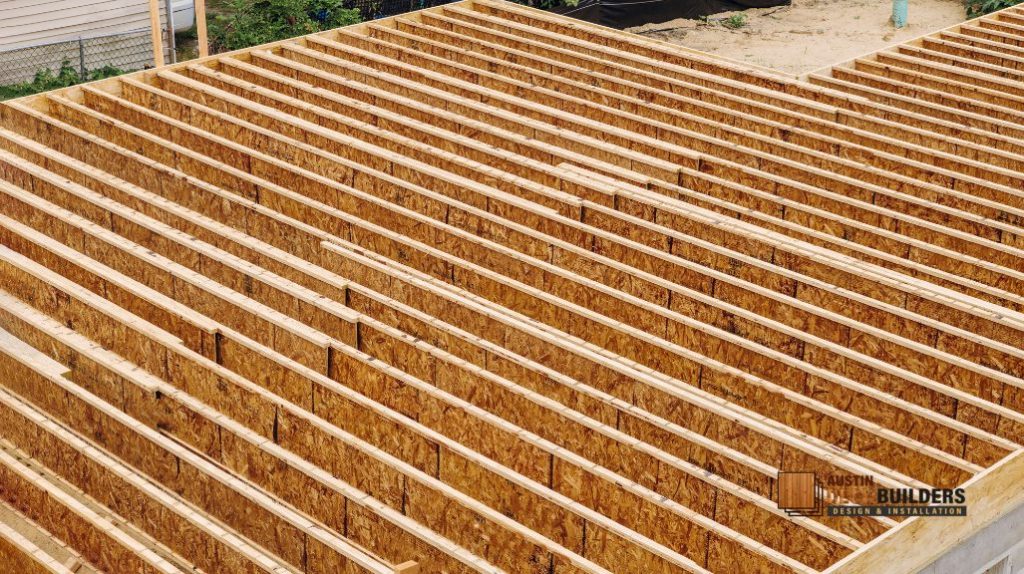
Deck joists are the backbone of your deck’s structure, forming a sturdy framework that distributes weight evenly and supports the decking boards. Their importance includes:
- Structural Integrity: Joists maintain the deck’s stability, preventing sagging or collapse.
- Safety: Damaged joists can lead to unsafe conditions, such as weak spots or uneven surfaces.
- Longevity: Regular maintenance and repairs ensure the durability of your deck.
Ensuring that all the joists are protected from moisture and damage is crucial for the overall stability and longevity of the deck.
When joists are compromised by moisture, wood rot, or pest damage, immediate action is required to prevent further deterioration and costly repairs.
Signs That Your Deck Joists Need Repair
Identifying problems early, such as rotted deck joists, can save you time and money. Here are some common signs your deck joists may need attention:
- Wood Rot: Soft or crumbling wood indicates moisture damage.
- Sagging Deck Boards: Uneven surfaces often point to failing joists underneath.
- Cracks or Splits: Visible damage weakens the structural integrity of the joists.
- Insect Infestation: Termites and carpenter ants can hollow out joists, compromising strength.
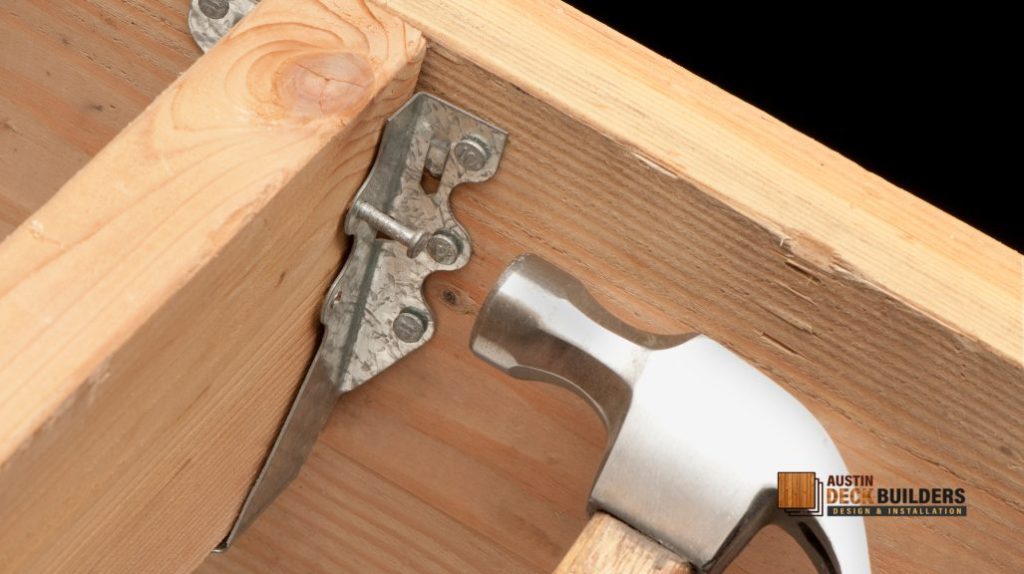
- Loose Joist Hangers: These metal brackets secure the joists to the ledger board; they may be at risk if they’re loose.
If the damage to your deck joists is extensive, you might need to consider a full replacement. Learn more in our guide on Signs You Need a New Deck.
Tools and Materials Needed for Deck Joist Repair

The right tools and materials are essential for a successful deck repair. Each item serves a specific purpose: to ensure the job is done safely and efficiently. Below is a breakdown of the tools and materials you’ll need, along with their uses:
Having the right tools and materials is essential for effectively repairing deck joist rot and ensuring the longevity of your deck.
Tools and Their Uses
- Pry Bar
- Use: A pry bar is essential for removing rotted wood from the joists to ensure a solid foundation for repairs.
- Why It’s Important: It is essential to carefully detach damaged boards or joists from joist hangers or other connections.
- Power Drill
- Use: Used to drive screws or drill holes for securing joists and joist hangers.
- Why It’s Important: Ensures that connections are secure and allows for precise fastening of replacement components.
- Circular Saw
- Use: Used to cut damaged joists into sections for easy removal or to trim replacement joists to the correct size.
- Why It’s Important: It provides clean, precise cuts that are critical for fitting replacement joists.
- Hammer
- Use: Used for driving nails into place or tapping joist hangers into position.
- Why It’s Important: A primary tool for fastening and making minor adjustments during installation.
- Measuring Tape
- Use: Measures the dimensions of damaged joists and ensures accurate sizing of replacement pieces.
- Why It’s Important: Prevents mistakes in cutting, ensuring replacement joists fit snugly.
- Level
- Use: Ensures the joists are appropriately aligned and level with the rest of the deck structure.
- Why It’s Important: Proper leveling prevents uneven surfaces and structural issues.
- Shovel or Post Hole Digger (for In-Ground Decks)
- Use: Clear dirt around the base of joists or dig out old supports if necessary.
- Why It’s Important: Ensures proper access to in-ground joists and a stable foundation for replacements.
Materials and Their Uses
- Replacement Joists (Pressure-Treated Wood)
- Use: These serve as the structural backbone of your deck, replacing damaged joists.
- Why It’s Important: Damaged or rotted joists must be replaced to maintain the deck’s structural integrity. Pressure-treated wood resists rot, moisture, and insect damage, ensuring durability.
- Joist Hangers
- Use: Metal brackets secure the joists to the ledger board and beams.
- Why It’s Important: Ensures stability and prevents the joists from shifting over time.
- Galvanized Nails or Screws
- Use: Fasteners for securing joists and joist hangers.
- Why It’s Important: Galvanized coatings resist rust and corrosion, ensuring long-term durability.
- Wood Sealant or Preservative
- Use: Applied to replacement joists to protect against moisture and insect damage.
- Why It’s Important: It extends the lifespan of the joists and reduces future maintenance needs.
- Concrete Mix (for In-Ground Joists)
- Use: Used to secure the base of in-ground joists for added stability.
- Why It’s Important: It provides a sturdy foundation and prevents shifting or sinking over time.
- Epoxy or Wood Filler (for Minor Repairs)
- Use: Fills small cracks or voids in partially damaged joists.
- Why It’s Important: Strengthens minor damage without requiring full replacement.
Tips for Using These Tools and Materials
- Safety First: Always wear protective gear, such as gloves and safety goggles, when working with power tools or cutting materials.
- Precision Matters: Measure twice and cut once to avoid errors leading to additional costs or weakened structural integrity.
- Invest in Quality: Choose high-quality materials, such as pressure-treated wood and galvanized fasteners, to ensure your repairs last for years.
You can confidently approach your deck repair project by understanding each tool’s and material’s purpose. At Austin Deck Builders, we prioritize using the best tools and materials for every project to ensure safety, durability, and aesthetic appeal. Let us handle the hard work so you can enjoy a sturdy, beautiful deck!
Step-by-Step Guide to Repairing Deck Joists

Step 1: Inspect the Deck Joists
- Remove a few deck boards to access the joists below.
- Examine each joist for rot, cracks, and insect damage.
- Mark any rotted deck joist or other damaged sections for replacement or repair.
Step 2: Support the Deck
- Temporarily support the deck using a jack and beams to ensure safety during the repair process.
- Place the supports near the damaged joists to relieve pressure.
Step 3: Remove the Damaged Joist
- Use a pry bar to detach the damaged joist from its hangers.
- If necessary, cut through the joist using a circular saw to remove it safely.
Step 4: Prepare the Replacement Joist
- Measure the space for the new joist and cut it to the appropriate length.
- Treat the wood with a sealant to protect it from moisture, pests, and rotting.
Step 5: Install the New Joist
- Secure the replacement joist using galvanized nails or screws.
- Attach the joist to the ledger board and beams using joist hangers.
- Ensure the joist is level before entirely securing it.
- Ensure that all steps are followed meticulously to repair deck joist rot and prevent future issues.
Step 6: Check and Reinforce
- Inspect the repaired area to ensure the new joist is securely installed and no rotted wood remains.
- Reinforce the surrounding joists, if necessary, with additional screws or brackets.
Step 7: Replace Deck Boards
- Reattach the deck boards removed during the inspection.
- Secure them with screws to complete the repair.
Avoid pitfalls by familiarizing yourself with Common Deck Building Mistakes during your repair or construction process.
Preventative Maintenance Tips for Deck Joists
To extend the life of your deck joists and reduce the need for frequent repairs, follow these maintenance tips:
- Seal and Stain Regularly: Protect your joists from moisture and UV damage with a high-quality sealant.
- Clean Your Deck: Remove debris that can trap moisture and lead to rot.
- Inspect Annually: Check for signs of damage or wear at least once a year.
- Improve Drainage: Ensure water flows from the deck to prevent pooling and wood decay.
Regular maintenance is essential to prevent damage. Learn more in our guide on How to Maintain a Wood Deck.
Cost of Repairing Deck Joists in Austin
Repairing deck joists is often more cost-effective than replacing the entire deck. Here’s a general cost breakdown for repairs in Austin:
| Repair Type | Estimated Cost |
|---|---|
| Minor Joist Repairs | $150–$500 |
| Replacing a Single Joist | $300–$800 |
| Reinforcing Joists | $200–$600 |
| Complete Joist Replacement | $1,000–$3,000 |
For a more comprehensive look at repair costs, check out our blog on How Much Does Deck Repair Cost
Frequently Asked Questions (FAQs)
Don’t let damaged joists compromise your deck’s safety. Contact Austin Deck Builders today for expert deck repair services in Austin. Schedule a consultation, and let us bring your outdoor space back to life!